HOMEMADE EGG ROLL RECIPES


HOMEMADE EGG ROLL WRAPPERS RECIPE - SIDECHEF
Once you make these Homemade Egg Roll Wrappers, you'll never buy them again. You could cut these into smaller squares and use them as wonton wrappers too. A pasta machine makes easy work of flattening out the dough.
Provided by Cooking with Tovia
Categories Pescatarian Vegetarian Whole30 Easy Make Ahead Dairy-Free Shellfish-Free Weekend Project Soy-Free Stand Mixer Fish-Free Peanut-Free Tree Nut-Free Sugar-Free Tomato-Free
Total Time 3600S
Yield 12
Number Of Ingredients 4
Steps:
- Into the bowl of a stand mixer fitted with a dough hook, add All-Purpose Flour (2 cup), Salt (3/4 teaspoon), Water (1/3 cup), and Egg (2). Mix on low speed for 2-3 minutes, until dough comes together.
- Knead on low speed for another 3-4 minutes.
- Wrap the dough in plastic wrap. Let rest for 30-45 minutes.
- Divide dough into 4 equal parts. Re-wrap any dough you aren't currently using. Fold dough into a square.
- Using a pasta machine on the widest opening, crank your dough through. Fold each side into the middle, then run it through again.
- Switch pasta machine to the next narrowest setting and run it through twice. Repeat, switching to increasingly narrow settings, until you reach the smallest setting. When dough gets too long, cut it in half and continue.
- Trim dough into squares.
- Refrigerate egg roll wrappers for later, or use right away. If stacking, dust each side with flour so they don't stick to each other.
Nutrition Facts : Calories 7 calories, ProteinContent 0.3 g, FatContent 0.1 g, CarbohydrateContent 1.2 g, FiberContent 0.0 g, SugarContent 0.0 g, SodiumContent 13.6 mg, SaturatedFatContent 0.0 g, TransFatContent 0.0 g, CholesterolContent 2.5 mg, UnsaturatedFatContent 0.0 g
DELICIOUS HOMEMADE EGG NOODLES RECIPE - FOOD.COM
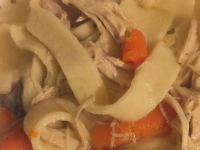
This is one of our family's best recipes ever! It came from my great-grandma who was the best cook in our family. I love it, my family loves it, and we hope you do too!
Total Time 1 hours 12 minutes
Prep Time 1 hours
Cook Time 12 minutes
Yield 10 serving(s)
Number Of Ingredients 5
Steps:
- Measure flour into bowl; make a well in the center and add egg yolks, whole egg and salt.
- With hands, thoroughly mix egg into flour.
- Add water, 1 tablespoon at a time, mixing thoroughly after each addition.
- (Add only enough water to form dough into a ball.).
- Turn dough onto well-floured board; knead until smooth and elastic, about 10 minutes.
- Cover; let rest 10 minutes.
- Divide dough into 4 equal parts.
- Roll dough, 1 part at a time, into paper-thin rectangle, keeping remaining dough covered.
- Roll rectangle around rolling pin; slip out rolling pin.
- Cut dough cross-wise into 1/8-inch strips for narrow noodles and 1/4-inch for wide noodles.
- Shake out strips and place on towel to dry, about 2 hours.
- When dry, break dry strips into smaller pieces.
- Cook in 3 quarts boiling salted water (1 tablespoon salt) (We use chicken broth.) 12 to 15 minutes or until tender.
- Drain thoroughly.
Nutrition Facts : Calories 112.9, FatContent 1.9, SaturatedFatContent 0.6, CholesterolContent 68.4, SodiumContent 475.1, CarbohydrateContent 19.3, FiberContent 0.7, SugarContent 0.1, ProteinContent 3.9
More about "homemade egg roll recipes"
DELICIOUS HOMEMADE EGG NOODLES RECIPE - FOOD.COM
From food.com
Reviews 5.0
Total Time 1 hours 12 minutes
Calories 112.9 per serving
- Drain thoroughly.
HOW TO MAKE FRESH PASTA | HOMEMADE PASTA | JAMIE OLIVER
From jamieoliver.com
Total Time 1 hours
Cuisine https://schema.org/VegetarianDiet, https://schema.org/LowLactoseDiet
Calories 415 calories per serving
- Place the flour on a board or in a bowl. Make a well in the centre and crack the eggs into it. Beat the eggs with a fork until smooth.
- Using the tips of your fingers, mix the eggs with the flour, incorporating a little at a time, until everything is combined.
- Knead the pieces of dough together – with a bit of work and some love and attention they’ll all bind together to give you one big, smooth lump of dough!
- Once you’ve made your dough you need to knead and work it with your hands to develop the gluten in the flour, otherwise your pasta will be flabby and soft when you cook it, instead of springy and al dente. There’s no secret to kneading. You just have to bash the dough about a bit with your hands, squashing it into the table, reshaping it, pulling it, stretching it, squashing it again. It’s quite hard work, and after a few minutes it’s easy to see why the average Italian grandmother has arms like Frank Bruno! You’ll know when to stop – it’s when your pasta starts to feel smooth and silky instead of rough and floury.
- Wrap the dough in clingfilm and put it in the fridge to rest for at least 30 minutes – make sure the clingfilm covers it well or it will dry out and go crusty round the edges (this will give you crusty lumps through your pasta when you roll it out, and nobody likes crusty lumps!).
- How to roll your pasta: first of all, if you haven't got a pasta machine it's not the end of the world! All the mammas I met while travelling round Italy rolled pasta with their trusty rolling pins and they wouldn't even consider having a pasta machine in the house! When it comes to rolling, the main problem you'll have is getting the pasta thin enough to work with. It's quite difficult to get a big lump of dough rolled out in one piece, and you need a very long rolling pin to do the job properly. The way around this is to roll lots of small pieces of pasta rather than a few big ones. You'll be rolling your pasta into a more circular shape than the long rectangular shapes you'll get from a machine, but use your head and you'll be all right!
- If using a machine to roll your pasta, make sure it's clamped firmly to a clean work surface before you start (use the longest available work surface you have). If your surface is cluttered with bits of paper, the kettle, the bread bin, the kids' homework and stuff like that, shift all this out of the way for the time being. It won't take a minute, and starting with a clear space to work in will make things much easier, I promise.
- Dust your work surface with some Tipo 00 flour, take a lump of pasta dough the size of a large orange and press it out flat with your fingertips. Set the pasta machine at its widest setting - and roll the lump of pasta dough through it. Lightly dust the pasta with flour if it sticks at all.
- Click the machine down a setting and roll the pasta dough through again. Fold the pasta in half, click the pasta machine back up to the widest setting and roll the dough through again. Repeat this process five or six times. It might seem like you're getting nowhere, but in fact you're working the dough, and once you've folded it and fed it through the rollers a few times, you'll feel the difference. It'll be smooth as silk and this means you're making wicked pasta!
- Now it's time to roll the dough out properly, working it through all the settings on the machine, from the widest down to around the narrowest. Lightly dust both sides of the pasta with a little flour every time you run it through.
- When you've got down to the narrowest setting, to give yourself a tidy sheet of pasta, fold the pasta in half lengthways, then in half again, then in half again once more until you've got a square-ish piece of dough. Turn it 90 degrees and feed it through the machine at the widest setting. As you roll it down through the settings for the last time, you should end up with a lovely rectangular silky sheet of dough with straight sides - just like a real pro! If your dough is a little cracked at the edges, fold it in half just once, click the machine back two settings and feed it through again. That should sort things out.
- Whether you're rolling by hand or by machine you'll need to know when to stop. If you're making pasta like tagliatelle, lasagne or stracchi you'll need to roll the pasta down to between the thickness of a beer mat and a playing card; if you're making a stuffed pasta like ravioli or tortellini, you'll need to roll it down slightly thinner or to the point where you can clearly see your hand or lines of newsprint through it.
- Once you've rolled your pasta the way you want it, you need to shape or cut it straight away. Pasta dries much quicker than you think, so whatever recipe you're doing, don't leave it more than a minute or two before cutting or shaping it. You can lay over a damp clean tea towel which will stop it from drying.
HOW TO MAKE HOMEMADE PUMPKIN ROLL | PUMPKIN ROLL R…
From foodnetwork.com
Reviews 4.3
Total Time 1 hours 20 minutes
Category dessert
- With an electric mixer, combine the confectioners' sugar, cream cheese, butter and vanilla and beat until smooth. Carefully unroll the cooled cake and spread the mixture on top of the cake. Gently re-roll the cake up and refrigerate it until you're ready to slice and serve. Dust with confectioners' sugar just before serving.
HOMEMADE EASY EGG ROLL RECIPE - 6 ... - TASTE AND TELL
From tasteandtellblog.com
10 BEST ROLL EGG ROLL WRAPPERS RECIPES - YUMMLY
From yummly.com
EGG ROLL RECIPES | ALLRECIPES
From allrecipes.com
AIR FRYER EGG ROLLS {EASY EGG ROLL ... - SUSTAINABLE COOKS
From sustainablecooks.com
BEST HOMEMADE EGG ROLLS + VIDEO | LIL' LUNA
From lilluna.com
EASY HOMEMADE EGG NOODLES | TASTES BETTER FROM SCRATCH
From tastesbetterfromscratch.com
BEST HOMEMADE EGG ROLLS RECIPE | THE RECIPE CRITIC
From therecipecritic.com
HOMEMADE HOAGIE ROLL RECIPE - THE SPRUCE EATS
From thespruceeats.com
7 DELICIOUS IRISH APPETIZERS FOR ST ... - HOMEMADE RECIPES
From homemaderecipes.com
10 BEST CABBAGE EGG ROLLS RECIPES - YUMMLY
From yummly.com
HOMEMADE WONTON WRAPPERS - CURIOUS CUISINIERE
From curiouscuisiniere.com
EGG ROLL IN A BOWL - AMANDA'S COOKIN' - GROUND BEEF
From amandascookin.com


