SOURDOUGH PIZZA - BREADTOPIA

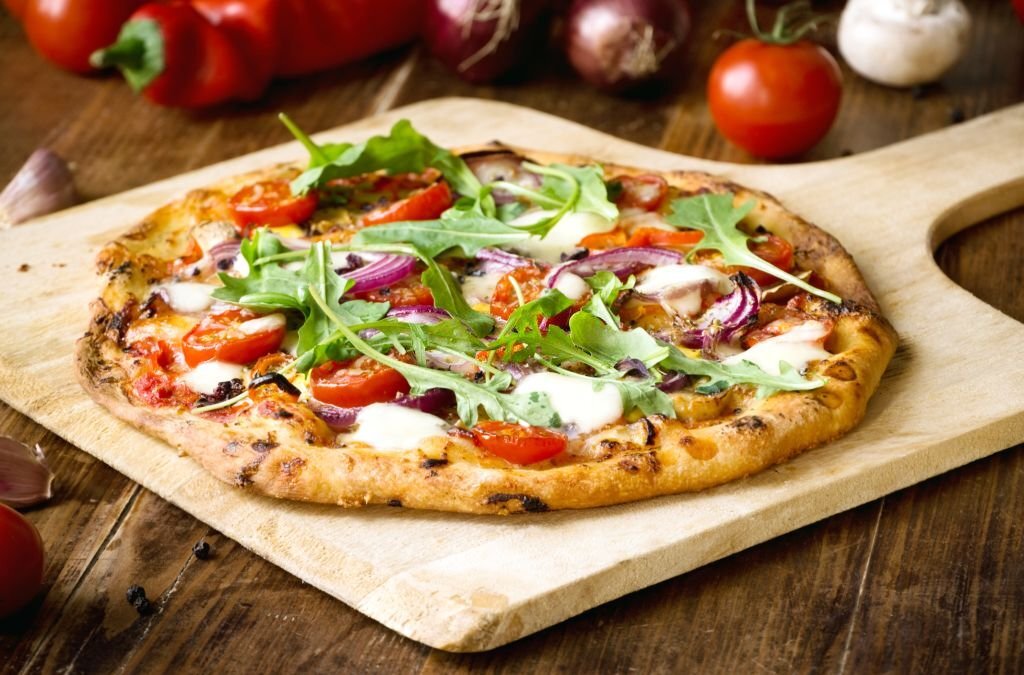
Homemade sourdough pizza is an eye-opening experience, with so much flavor in the dough and a crispy chewy texture to the crust. Add to that cooking the pizza in a wood-fired oven and you'll be dazzled by added smoke character, toasted crust edges, and more intensely caramelized toppings.
Provided by Melissa Johnson
Total Time 1 hours 4 minutes
Prep Time 1 hours 0 minutes
Cook Time 4 minutes
Number Of Ingredients 18
Steps:
- Levain
- Prepare your 120g of starter by mixing 40g of starter with 40g of water and 40g of flour. This is a 1:1:1 starter preparation, but other builds are fine too. Mark your jar with a rubberband and let it sit at room temperature for 4-8 hours until roughly tripled.
- Mixing and First Rise
- Mix the ingredients, including the 120g of mature starter, together by hand, or in a mixer with the dough hook attachment, until everything is incorporated and forming a ball around the hook.
- Scrape the dough out onto a floured counter and knead it for 3-5 minutes, adding a small amount of flour until the dough is manageable.
- I prefer to hand knead the dough, but if you want to keep the dough in your mixer for 5-10 minutes until it passes the windowpane test, that is fine too. Covering it while it's still shaggy, and doing several rounds of stretching and folding over the course of a couple of hours is also an option.
- Lightly oil a bowl, dab the "top" of your dough ball in the oil, then lay the bottom side down in the bowl and cover.
- Let the dough rise until it has approximately doubled. I tend to leave the dough at room temperature for a few hours and then put it in the refrigerator for a day or so, and finally pull it out when it is fully risen or close to fully risen and just needing a few more hours at room temperature.
- The bulk fermentation can be just a few hours if you use warm water and have a warm house or put the dough in a lit oven, or this can be five days if you use sleepy starter and put the dough in a 37F refrigerator. I did the latter recently, and the pizza was tasty-sour and the crust perfectly bubbly.
- Preshape and Second Rise
- When the bulk fermentation is finished, lightly oil a 9x13 baking pan and your counter.
- Scrape out the dough onto the oiled counter, gently press out most of the air, and divide the dough into 4-5 pieces. The total dough weight is approximately 1140g. This makes five approx. 225g or four 285g pizzas. (You can go larger and smaller, but you may need to adjust cook time.)
- Form each piece into a ball by folding the sides of the piece inward. Then hold the ball in one hand with the taut top on your palm, while you pinch the bottom pieces together with your other hand.
- Place the balls in the oiled pan seam-side down, and cover or put the entire pan in a plastic bag. The final proof can be at room temperature for 45-90 minutes or in the refrigerator for 8-12 hours. Various combinations of room temperature and cold proofing work, and a lot depends on how warm the dough was when you shaped it, and if your room temperature is very warm. Even in a heat wave, I've not seen a big difference in pizza outcome when the first dough ball of a batch was formed into a pizza and cooked an hour before the last dough ball.
- Topping Prep
- 45-90 minutes before the dough is finished proofing, set up your toppings and the area where you will be stretching and "decorating" your pizza. My preferred pizza sauce is NYTimes Classic Marinara plus 6 ounces of tomato paste (sometimes I skip the paste). I like to make it ahead of time, and simply pull it out of the refrigerator to warm up a bit when I'm setting up the toppings.
- Shaping and Baking (by oven type)
- Wood-Fired Oven
- About 30 minutes before your dough is finished proofing, fire up your pizza oven. Make sure your Uuni or other pizza oven is clean and ready to go -- the stone tiles have been brushed off, and the charcoal/wood tray has been emptied.
- Have everything you need on hand: kindling, charcoal, gloves, an aluminum pizza peel, and a "hot plate" to lay the door on (also the cast iron pan if you cook vegetables or meat too). I use a couple pieces of kindling as a rack, and steel/aluminum baking sheets and cooling racks for the pizzas that come out of the oven. (See gallery)
- Your damper in the chimney should be open, and the flue at the base of the chimney inside the oven should be about half open.
- Place 4-6 pieces of very dry kindling in the fuel area of your pizza oven. Light them and put the cover back on. Checking on them every few minutes, let them burn for about 5-10 minutes, until they are fully burning. Add about 15 pieces of lump charcoal and wait another 10 minutes or until the temperature is over 700F. About 5 minutes before cooking your pizzas, you can add wood again for an extra burst of heat. Wait a few minutes for the wood to be fully lit and the smoke to be white or clear, not black, before before loading a pizza. This entire process takes about 20 minutes, and this is what has worked for me, but you may prefer different time parameters, fuel types and amounts.
- Prepare your pizza peel with flour and cornmeal. Rub the flour into the wood and sprinkle the cornmeal on the top of the flour. I prefer a wood peel for prepping and loading pizzas, and an aluminum peel for removing them. A third smaller peel for turning the pizza is a helpful option, too.
- Remove a dough ball from the proofing pan and gently grasp one side of the circle with both hands. Holding the top edge of the circle (10 o'clock and 2 o'clock), let the rest of the dough droop/stretch downward while you then rotate and re-grab the dough like you're turning a steering wheel. This will develop about a 1/2-1 inch crust edge and stretch the middle. (Using a rolling pin is fine too.)
- If the dough only stretches a bit, lay it down on your floured counter for 5-10 minutes while you work on your other dough balls and check on your oven temperature. By the time you come back to the first circle, the gluten should have relaxed and you will be able to stretch it further. Try not to let any part of the dough get thin enough to see through or you may end up with a hole.
- Lay your pizza dough on the floured/cornmealed pizza peel. Stretch and adjust the dough a little more, aiming to position one edge of the pizza all the way at the front edge of the peel. When you insert the peel into the oven, the front edge of the dough will "catch" on the hot stone, making it easier to slide the peel out from under the pizza.
- Now top your pizza dough to your liking and put it in the oven. If you leave the pizza on the peel for more than a few minutes, it may begin to stick to the peel, so keep your assembly line moving.
- After about 1.5 minutes of cooking, rotate your pizza with an aluminum peel. The heat is strongest in the back of the oven near the fire, so this will encourage even cooking and char spots. After about 1.5 more minutes, your pizza is likely done.
- Using an aluminum peel, remove the pizza from the oven and put the pizza on a rack if not eating right away (this keeps the bottom crispy), or on a plate or a steel/aluminum sheet to serve.
- Repeat with the next pizza and so on. When you're finished cooking the pizzas, let the fuel burn off and the oven cool down before cleaning and storing it.
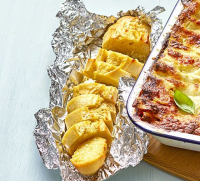
- See the last photo gallery for ideas for things to cook while the oven is warming up (pitas), cooling down (s'mores, garlic knots from extra dough), and still very hot (steak and veggies).
- Kitchen Oven
- About 30 minutes before your dough is finished proofing, preheat your kitchen oven with a baking stone or steel in it to 500F, using the top shelf if you have a top broiler. You can also use an upside-down baking sheet as your baking surface, with parchment paper under the dough, and preheated to only 450F.
- Flour and sprinkle cornmeal on the peel as described above, or use a square of parchment paper for each pizza.
- Remove a dough ball from the proofing pan and gently grasp one side of the circle with both hands. Holding the top edge of the circle (10 o'clock and 2 o'clock), let the rest of the dough droop/stretch downward while you then rotate and re-grab the dough like you're turning a steering wheel. This will develop about a 1/2-1 inch crust edge and stretch the middle. (Using a rolling pin is fine too.)
- If the dough only stretches a bit, lay it down on your floured counter for 5-10 minutes while you work on your other dough balls and check on your oven temperature. By the time you come back to the first circle, the gluten should have relaxed and you will be able to stretch it further. Try not to let any part of the dough get thin enough to see through or you may end up with a hole.
- Lay your pizza dough on the piece of parchment paper or floured/cornmealed pizza peel. Stretch and adjust the dough a little more, aiming to position one edge of the pizza all the way at the front edge of the peel if that is what you're using. When you insert the peel into the oven, the front edge of the dough will "catch" on the hot stone, making it easier to slide the peel out from under the pizza.
- Now top your pizza dough to your liking and put it in the oven. If you leave it on the peel for more than a few minutes, it may begin to stick to the peel, so keep your assembly line moving or use parchment paper.
- For a pizza stone or steel, bake for 7 minutes, then switch to broil for 1 minute more. Keep the oven on broil an additional minute before you load the next pizza. This helps reheat the stone before you switch back to bake mode.
- For a baking sheet, bake the pizza on parchment paper on the sheet for 8 minutes, then broil (still at 450F) for 1-2 minutes. Then move the pizza to a bare lower rack, removing the parchment after the transfer, and bake 3-4 more minutes.
- Remove the pizza from the oven with a peel, spatula, or even by tugging on a corner of the parchment paper.
- Put the pizza on a rack if not eating right away (this keeps the bottom crispy), or on a plate or a steel/aluminum sheet to serve.
- Repeat with the next pizza and so on.
SOURDOUGH CIABATTA - BREADTOPIA

Sourdough ciabatta is perfect for bruschetta, juicy BBQ sandwiches, garlic bread, and soft cheeses. This recipe is surprisingly fast because of the large amount of active starter in the dough, and easy because of the simple shaping process.
Provided by Eric Rusch
Total Time 1 hours 5 minutes
Prep Time 45 minutes
Cook Time 20 minutes
Number Of Ingredients 6
Steps:
- Sourdough Starter
- Build a 100% hydration (or higher) sourdough starter over a couple of days until it is more than 550g in weight, about 4 1/2 cups volume, active and floating.
- There are numerous, equally effective ways to get this amount of active starter. I fed my starter and refrigerated it at about 2 cups in volume. On baking day, I put 220g of starter in a large bowl, fed it 150g of all-purpose flour and 180g of water. In volume, this is approximately 1 cup starter, 1 cup flour and 3/4 cup water. Several hours later, it was over four cups in volume and it floated.
- Hand Mixing Instructions
- Mix together in a large bowl all of the ingredients (flour, active starter, water, olive oil, salt) except the additional 75g of water. I used a danish dough whisk until the ingredients were incorporated. Mark the time here if you like to track fermentation this way.
- Develop the gluten in the dough by hand for 8-10 minutes or until the dough passes the windowpane test. Use one hand to turn the bowl and the other hand to scrape, scoop and pull the dough around the bowl in the opposite direction. Feel free to take breaks and do not worry about pausing the clock. Here is a video of this mixing technique.
- Add the additional 75g of water and gently fold and squeeze it into the dough.
- Stand Mixer Instructions
- If you prefer to use a stand mixer, you can put all of the ingredients including the extra 75g of water into the mixer bowl at once and use the paddle attachment on med speed for 5 minutes and then the dough hook attachment on med speed for 2 minutes or until dough passes the windowpane test.
- After Mixing
- Cover and let the dough rest for 30 minutes.
- For the first stretch and fold, lift the dough with a dough scraper from one side and flop it over to the opposite side. Do four sides, twice around.
- Cover and let the dough rest for 30 minutes.
- For the second stretch and fold, lightly oil a new bowl, scrape the dough into the new bowl and stretch and fold using the dough scraper from all four sides once around.
- Cover and let rest 60 minutes.
- For the third stretch and fold, wet your fingertips and gently pull the sides of the dough off the bowl and toward the center of the dough. After you have done this around the entire bowl, scoop the dough up with both hands coming from the sides and downward (so that the dough is like a droopy cat with your hands in the middle). Do not pull hard and rip the dough if it does not come off the bowl easily. Lay it back down and scoop again but from the other sides. Repeat both directions a second time.
- Cover and let ferment until puffy and roughly doubled.
- My bulk fermentation from the initial mixing of the dough was 4 hours at a room temperature of 79F.
- Heavily flour your countertop, then scrape/pour the dough onto it. Flour your hands repeatedly and gently slide your fingers under the dough from all sides to pull it outward into a rectangular shape about 1/2 an inch thick.
- This technique does not de-gas the dough, and seems to encourage big irregular holes in the crumb. I also made a batch where I pressed the dough into a rectangle, de-gassing it, and I got more regular holes in the crumb. Both techniques work well in my opinion.
- Flip the bottom half of the dough onto the top half (fold along the long side of the rectangle.) You will now have a narrower rectangle with a floured top (and bottom).
- Gently cut the dough into 3 square-ish pieces. See photo gallery.
- Prepare a linen couche with a lot of flour. Create channels, as in this photo and the photo in the gallery below, wide enough to lay the dough slipper in. You can also use tea towels or parchment paper.
- Using a bench scraper, transfer the three slippers to the couche. In the transfer, you can gently stretch the slippers to be a little longer.
- Loosely cover and let proof for about 1 hour (longer at temps under 75F).
- If you have a baking stone, put it in the oven. You can also cook the slippers on a metal cookie sheet or upside down cast iron pan. (Do not use a dark non-stick surface because of the high oven temperature).
- Prepare to create steam early in the baking process. You can put a cast iron pan on the shelf under the baking stone. Or you can create a drip system by putting an aluminum pan with a pinhole in the oven under the stone, and a metal cookie sheet on the base of the oven. When making the pinhole, test over your sink that water drips through it about 1-2 drops a second. This system was devised by Breadtopia community member @peevee.
- My heating element is exposed on the bottom of my oven, so the aluminum pan drips onto the bottom of the oven rather than a cookie sheet, which works fine too.
- Preheat your oven to 500 F for 30 minutes before the dough finishes proofing. If you are baking on a cookie sheet, a 15 minute preheat should be enough.
- When proofing is complete, flip your slippers over onto three narrow sheets of parchment paper, place them on a pizza peel (an upside-down cookie sheet can be a peel too), and slide the slippers onto your preheated stone or cookie sheet.
- I fit three ciabatta slippers on my stone with a little careful adjustment, but you can do two batches if needed.
- Pour a cup of water onto the aluminum tray or cast iron pan that is under your stone or cookie sheet, and quickly close the oven door to trap the steam.
- Bake at 500 F for 10 minutes. Then remove the parchment paper and rotate the slippers 180 degrees if your oven seems to brown unevenly.
- Bake an additional 8-10 minutes at 450 F.
- Important After baking, turn off the oven, crack open the door a couple of inches, and leave the slippers in the oven for another 5 minutes. This will make the crust crunchier.
- If you make rolls or larger slippers, adjust your cooking time accordingly. Internal temperature should be about 205 F.
- Let cool on a rack for at least 1 hour before slicing.
- For most purposes (olive oil and tomatoes, butter and blue cheese, BBQ pulled meat), I like to slice a slipper horizontally and then into roll-size pieces 3-4 inches wide.
MYPIZZACORNER.COM | FORGET TAKEAWAYS! | HOMEMADE PIZZA …
The Place For Pizza Tips & Recipes. Welcome To My Pizza Corner! At My Pizza Corner you can find the best tips, recipes, equipment reviews, and everything to do with homemade pizza! ... The Windowpane Test | Neapolitan Pizza from scratch | Part 3. How do you test pizza dough? The windowpane test is a really simple test …
From mypizzacorner.com
From mypizzacorner.com
See details
NEW YORK-STYLE PIZZA RECIPE - SERIOUS EATS
Aug 30, 2018 · So here's my theory: in order to get a ball of pizza dough to pass the windowpane test, it needs to be kneaded for a relatively long period of time. In a large-scale, New York pizza …
From seriouseats.com
From seriouseats.com
See details
BASIC NEW YORK-STYLE PIZZA DOUGH RECIPE - SERIOUS EATS
Apr 03, 2020 · Transfer dough ball to lightly floured surface and knead once or twice by hand until smooth ball is formed. It should pass the windowpane test. Divide dough into three even parts and …
From seriouseats.com
From seriouseats.com
See details
WINDOWPANE PLAID FLOUR SACK TOWEL | WILLIAMS SONOMA
Oct 24, 2021 · Stock the kitchen with our multifunctional towels, loomed from durable cotton inspired by the vintage flour sacks that would be repurposed into linens. These towels are perfect for many kitchen tasks like bread baking, wiping down counters, or as a cheese cloth. The classic windowpane …
From williams-sonoma.com
From williams-sonoma.com
See details
WHAT IS NEW YORK STYLE PIZZA? (WHY IT’S SO DIFFERENT?)
The key to a good result is getting the base right. Some recipes suggest using a food processor to help create a smooth dough. Others swear by kneading it by hand. But whichever approach you take, you need to know when your dough is ready. And for that, you can use something called the windowpane test…
From bacinos.com
From bacinos.com
See details
SOFT PRETZELS RECIPE - PREPPY KITCHEN
Feb 12, 2021 · Do the windowpane test - a great way to know if your dough is kneaded enough is to do the windowpane test, here's how you do it. Remove a small piece of dough about the size of a golf ball and gently stretch it to create a thin membrane-like pane or windowpane…
From preppykitchen.com
From preppykitchen.com
See details
PIZZA DOUGH PROBLEMS | COMMON DOUGH PROBLEMS AND …
Making great pizza dough is not without problems. But once you know what's caused the problem it's usually easy to fix. Fortunately, I have made hundreds of pizzas and now I'm going to share answers to some of the most common pizza dough problems.
From mypizzacorner.com
From mypizzacorner.com
See details
AUTHENTIC NEAPOLITAN PIZZA DOUGH RECIPE: THE BEST PIZZA …
Cheese. The most common types of cheese for Neapolitan pizza are fresh mozzarella (fior di latte) and buffalo mozzarella.You want to stay away from the low-quality grated supermarket cheeses. A standard Neapolitan pizza needs around 70-100g of mozzarella.. Hard, aged cheeses are also common to add to the pizza…
From thepizzaheaven.com
From thepizzaheaven.com
See details
HOW TO KNEAD BREAD DOUGH TO PERFECTION - THE SPRUCE EATS
Oct 16, 2020 · If you are unsure if the dough has been kneaded enough, you can do the "windowpane" test. Remove a small bit of dough (about the size of a golf ball) and hold it between your …
From thespruceeats.com
From thespruceeats.com
See details
SOURDOUGH FRENCH BREAD - FARMHOUSE ON BOONE
Apr 29, 2021 · The windowpane test is when you take a small piece of the dough and try to stretch it into a square-like shape. If you can stretch it thin enough where you can “see through it”, then the gluten formation is adequate. If, after kneading, your dough just breaks apart, then knead it longer until it can pass this test.
From farmhouseonboone.com
From farmhouseonboone.com
See details
7 BEGINNER BREAD RECIPES TO START BAKING AT HOME | KITCHN
Mar 26, 2020 · Starting with the most simple bread recipes is the key to learning the basics and gaining confidence. These seven recipes, including no-knead bread, are far from …
From thekitchn.com
From thekitchn.com
See details
RECIPELION REVIEWS AND GIVEAWAYS | RECIPELION.COM
RecipeLion offers 1000s of delicious everyday food recipes that are perfect for the home chef. Our test kitchen chef Addie Gundry cooks up easy dinner recipes, desserts, and make-ahead …
From recipelion.com
From recipelion.com
See details
SOURDOUGH HAMBURGER BUNS - KING ARTHUR BAKING
Try the windowpane test: you should be able to stretch a piece of dough until you can see through it. Cover the dough and let it rest in a warm place (75°F to 80°F) for about 4 hours. To de-gas and even …
From kingarthurbaking.com
From kingarthurbaking.com
See details
SOURDOUGH BREAD STAND-MIXER RECIPE | THE EASY WAY - FOODGE…
The problem is that most of the recipes are more complicated, mine included. ... Then test the dough for a windowpane. If it doesn’t occur at first, mix 2 more minutes and then check again. Repeat until you get a good windowpane. ... Sourdough Pizza …
From foodgeek.dk
From foodgeek.dk
See details
NEW YORK BAGEL RECIPE: CRUSTY, CHEWY ... - BAKING A MOMENT
Jun 04, 2020 · YEAST. When I make any kind of bread, I use active dry yeast.But I know it’s been hard to get these last few months, so know that if you can’t find it, it’s fine to substitute with the same …
From bakingamoment.com
From bakingamoment.com
REAL HOMEMADE BAGELS RECIPE | ALLRECIPES
Mix on low speed using the dough hook until well-developed, about 8 minutes. To ensure the gluten has developed fully, cut off a walnut-sized piece of dough. Flour your fingers, and then stretch the dough: if it tears immediately, the dough needs more kneading. Fully developed dough should form a thin translucent "windowpane."
From allrecipes.com
From allrecipes.com
See details
PAIN DE CAMPAGNE - COUNTRY FRENCH BREAD RECIPE | ALLRECIPES
10 Snacks That Make Watching the Winter Olympics a Delicious Spectator Sport They're back! The 2022 Winter Olympics officially start on February 4 and run through February 20, as elite …
From allrecipes.com
From allrecipes.com
See details
BREAD BAKING GUIDE: TIPS, TOOLS AND TECHNIQUES FOR HOW TO ...
Mar 13, 2020 · Baking bread is one of the most satisfying at-home cooking projects. That freshly baked bread smell alone is worth the effort. Easy bread recipes are the way to go if you’re new to baking bread, and quick breads, made without yeast, are particularly simple to master.. After you learn the basics, we’re sure you’ll be absolutely hooked on making your own bread …
From tasteofhome.com
From tasteofhome.com
See details
BEGINNER ARTISAN SOURDOUGH BREAD RECIPE | HOMEMADE FOO…
Nov 14, 2017 · Sourdough recipes with starter require a VERY active Starter. You can use any starter recipe you prefer IF it can pass the float test. MOST important for a good rise in your loaf. Balancing Your Starter: To prepare your starter for baking bread do this: Feed your starter 1:1:1 and bring it back to the float test.
From homemadefoodjunkie.com
From homemadefoodjunkie.com
See details
HOW TO TELL IF YOU'RE KNEADING DOUGH THE RIGHT WAY | TASTE ...
Apr 05, 2019 · The Dough Passes the Windowpane Test. Perhaps the best way to tell if your bread dough is properly kneaded is the windowpane test. To do this, tear off a chunk of dough and stretch it between your fingers. If the dough …
From tasteofhome.com
From tasteofhome.com
See details
PAIN DE CAMPAGNE - COUNTRY FRENCH BREAD RECIPE | ALLRECIPES
10 Snacks That Make Watching the Winter Olympics a Delicious Spectator Sport They're back! The 2022 Winter Olympics officially start on February 4 and run through February 20, as elite …
From allrecipes.com
From allrecipes.com
See details
BREAD BAKING GUIDE: TIPS, TOOLS AND TECHNIQUES FOR HOW TO ...
Mar 13, 2020 · Baking bread is one of the most satisfying at-home cooking projects. That freshly baked bread smell alone is worth the effort. Easy bread recipes are the way to go if you’re new to baking bread, and quick breads, made without yeast, are particularly simple to master.. After you learn the basics, we’re sure you’ll be absolutely hooked on making your own bread …
From tasteofhome.com
From tasteofhome.com
See details
BEGINNER ARTISAN SOURDOUGH BREAD RECIPE | HOMEMADE FOO…
Nov 14, 2017 · Bake Fabulous Sourdough bread recipes right in your own dutch oven at home. This is the place to start. ... Your Dough should pass the windowpane test. ... Best as Pizza and Dough …
From homemadefoodjunkie.com
From homemadefoodjunkie.com
See details
HOW TO TELL IF YOU'RE KNEADING DOUGH THE RIGHT WAY | TASTE ...
Apr 05, 2019 · The Dough Passes the Windowpane Test. Perhaps the best way to tell if your bread dough is properly kneaded is the windowpane test. To do this, tear off a chunk of dough and stretch it between your fingers. If the dough …
From tasteofhome.com
From tasteofhome.com
See details
EASY ARTISAN SOURDOUGH BREAD - FARMHOUSE ON BOONE
Jun 09, 2020 · Recipes like this artisan sourdough bread seem daunting or complicated. But many of the best things in life take time, love, and nurturing. ... It should pass the ‘windowpane’ test. ... Try putting an empty tray or a pizza …
From farmhouseonboone.com
From farmhouseonboone.com
See details
AUTHENTIC NY BAGELS - FEELING FOODISH
Jul 16, 2020 · I'd like to share my recipes for pizza, breads, Italian cakes and cookies, as well as other family favorites with you! ... Its the only way I got the ‘windowpane test’ to come out. For …
From feelingfoodish.com
From feelingfoodish.com
See details
SOURDOUGH CIABATTA BREAD RECIPE - THE PERFECT LOAF
Aug 21, 2018 · Slide the parchment paper with dough onto your baking surface using a pizza peel. Once you've loaded the dough, steam the oven and bake for 20 minutes with steam. Then, remove …
From theperfectloaf.com
From theperfectloaf.com
See details
UNPAPER KITCHEN TOWELS - SET OF 10 - WILLIAMS SONOMA
Sep 06, 2021 · Tailored from Turkish cotton, our loop-back terry towels earn their stripes by providing exceptional durability and ultra-absorption. The set of four tackles any spill and features coordinating patterns - yarn-dyed French stripes, stripe-bordered solids and windowpane …
From williams-sonoma.com
From williams-sonoma.com
See details
102 ACTUALLY USEFUL GIFTS FOR PRACTICAL PEOPLE IN ... - SELF
Dec 02, 2021 · The trio of wraps comes in three sizes and can be used to save fruit, veggies, cheeses, pizza, and more. Each wrap is washable, can be used for up to a year (or 100 times), and when finished, …
From self.com
From self.com
See details
BREAD TOO DENSE? HERE IS HOW TO LIGHTEN YOUR BREAD
Mar 25, 2020 · To test if bread is ready for the oven, the poke test can be used. To do this test: Poke the dough with a wet finger, if it springs back straight away give it longer to rise. The dough is ready when the poke leaves an imprint that stays for 3 seconds before it bounces back. Tip: The poke test …
From busbysbakery.com
From busbysbakery.com
See details
4 TYPES OF KITCHEN MIXER ATTACHMENTS AND WHAT THEY A…
Jun 12, 2020 · Its shape makes it able to withstand the dough’s elasticity, and kneading can be done more efficiently. Thus, it’ll be easier for your dough to pass the windowpane test! Dough …
From bakestarters.com
From bakestarters.com
See details
PANETTONE TROUBLE | THE FRESH LOAF
Jan 30, 2022 · 3 refreshes of the LM go well and triple in less than 4 hours. It tastes like apples without a hint of sourness, but I've never checked the ph or anything. First dough comes together nicely, though admittedly takes me well over an hour in my KA Professional. Windowpane …
From thefreshloaf.com
From thefreshloaf.com
See details
THE BEST OVEN THERMOMETER IN 2022 – ACCURACY AND CONTROL
Jul 08, 2021 · This NSF-certified oven thermometer by CDN is one of the most accurate best oven thermometer products on the market. Its range goes from 150 to 550 F or 70 to 280 C. I …
From cookyaunty.com
From cookyaunty.com
See details
GRUESOME MURDERS: FIVE-YEAR-OLD GIRL FOUND DROWNED ...
Jan 31, 2022 · Furthermore, the five-year-old girl’s body was found drowned headfirst in a big bucket full of water in the kitchen. ALSO READ: Farm murder: Elderly woman BRUTALLY beaten to …
From msn.com
From msn.com
See details


