HOW TO MAKE JAM - NYT COOKING
Preserve fruit at the height of its season, and enjoy it all year round. Alison Roman will show you how.
Provided by Alison Roman
Steps:
- The world of preserves is large and potentially confusing. Just consider jams, jellies and marmalades. They, and several others, are all styles of fruit cooked with sugar and canned or refrigerated to extend its life. In this guide, we’ll focus exclusively on jam, but, when it comes to preserves, it’s worth knowing some of the categories.Jelly is translucent and gelatinous. It’s often made only from the juice of fruits that aren’t suitable for making jam because they never break down; don’t contain enough natural pectin (the ingredient that creates that gelled, jammy texture); or have large, inedible, hard-to-remove seeds, like those in Concord grapes. Here, powdered pectin is added during the cooking process to help the liquid set into a firmer, wobbly texture, not unlike a slightly looser version of Jell-O. Jam is made with whole or cut fruit, cooked with sugar until it’s thickened and jammy. How gelled, or firm, the jam becomes depends on the fruit’s naturally occurring pectin or on any additional (usually powdered) pectin, which is incorporated during the cooking process. Depending on the fruit and how it was cut, the final product can be completely smooth or chunky with smaller, jammy pieces of fruit throughout. It should always be firm enough to spread and soft enough to spoon. Marmalade refers to preserves made from citrus fruit. There are several ways to make marmalade, some more time-consuming than others. But, in all of them, the fruit (rind, pith, fruit and/or peel) is simmered in water to soften then cooked with sugar to thicken. Here, too, how you prepare the fruit plays a role: Your end result can be lightly textured and clear, almost jellylike, or more gelatinous with larger, thicker pieces of softened rind throughout. Marmalade is best made with oranges, grapefruit, lemon or kumquats. (Limes are too bitter and not quite juicy enough.) While marmalade is a touch more complicated than jam, here’s a good recipe to start with.
- The best jams strike a balance among three ingredients: fruit, sugar and acid. Peak-season fruit is thickened with granulated sugar, which, along with an acid like lemon or lime juice, helps enhance its flavor. Achieving the right proportions can be a delicate dance, but it’s one worth mastering.Your final product will be only as good as the raw fruit you start with, so bear in mind the flavor, texture, sweetness and acidity of what you choose. Taste it to make sure it’s flavorful and well balanced so your jam will be, too. Nearly any fruit can be used, but the best jam comes from juicy specimens with a balance of sweet and tart flavors and high amounts of naturally occurring pectin, like raspberries, blueberries, plums and apricots. Resist the urge to use fruit so ripe it’s collapsing under the weight of its own juices: It might seem like an appealing choice, but it contains less pectin than fruit that’s just about to hit peak ripeness. That’s one reason the beginning of any fruit season is actually the best time for preserving. Unlike store-bought jam, which almost always has additional pectin, a homemade jam may vary from slightly looser to remarkably firm, but trust that you’re letting each fruit be its truest self, becoming as jammy or spreadable as it wants to be. For our recipes (found below), we’re using 4 pounds of fruit. If it’s a fruit that needs a pit or core removed, the amounts given in the ingredient list reflect how much fruit you should buy, so that after you pit and core, you should have 4 pounds.This chart shows some of the most commonly preserved fruits, and where they fall in relation to their pectin content and acidity. Aside from preserving the fruit, the sugar in the jam will also help determine its deliciousness, playing a role in both flavor and texture. Too much, and the jam will be unpalatable, the flavors of the fruit replaced with sickly sweetness. Not enough, and the jam will never achieve the proper texture, since fruit does not have enough natural sugar on its own to adequately gel. If you’re just starting out making jam, it’s best to stick with regular granulated sugar. Other sweeteners like brown sugar, honey or agave can be used in conjunction with sugar to lend different flavors, but they should never be used as the sole sweetener in jam. They contain different amounts of moisture, so they cook differently than granulated sugar, and their flavor is too pronounced. (This is about the fruit, remember?) While there are basic fruit-to-sugar ratios, it’s important to note that if you start with extremely tart fruit, you might have a jam that is more mouth-puckering than expected. For our recipes, we’re using anywhere from ¼ cup to ¾ cup sugar per pound of fruit. However, if you feel it needs a little more — if it’s not sweet enough, or if it’s too tart for your liking — you can add a bit of sugar to the recipe, to taste. Just be sure any adjustments are made at the beginning of the cooking process.Adding acid in the form of fresh lemon or lime juice is important for two reasons: First, it makes for a more well-balanced jam, returning some of the acidity lost with the addition of sugar. Second, pectin needs acid to properly activate, or firm up. The lemon or lime juice is added at the end to preserve its fresh tang and bright citrus flavors. Here, we’re adding about 1 tablespoon of lemon or lime juice per pound of fruit. The exception is our tomato jam, which uses 1 tablespoon of vinegar. Correction: An earlier version of this guide referred incorrectly to the process for canning tomatoes. It requires the addition of an acid, like lemon juice, lime juice or vinegar. It is not the case that no acid is needed.
- A well-made jam, featuring a single fruit, is a thing of beauty. But, every now and then, a little something extra can elevate a fine jam to something transcendent. Be sure to consider what flavors might complement the fruit, as well as how they will be added, and avoid anything that might be too assertive, have an unpleasant toothsomeness, if left in, or be hard to pick out, if not. Overwhelmed by possibility? Look for the kind of jam you’re making below for some of our best suggestions.Lemon or lime: Add 1 tablespoon fresh lemon or lime zest with the juice Ginger: Add 2 tablespoons freshly grated ginger with the sugar Elderflower: Add 2 tablespoons elderflower liqueur with the sugar Thyme: Add 2 sprigs thyme with the sugar (remove sprigs before canning)Orange flower water: Add 1 teaspoon with the juice Vanilla: Add 1 vanilla bean, split, with seeds scraped with the sugar (remove the pod before canning) Black pepper: Add 1 teaspoon freshly ground black pepper with the sugar Lemon verbena: Add 4 whole lemon verbena sprigs with the sugar (remove sprigs/leaves before canning)Rose: Add 2 teaspoons rose water with the lemon or lime juice Ginger: Add 2 tablespoons freshly grated ginger with the sugar Lime or Orange: Add 1 tablespoon freshly grated lime or orange zest with the juiceOrange blossom: Add 1 teaspoon orange flower water with the juice Citrus: Add 1 tablespoon fresh lemon, lime or orange zest with the juice Black pepper: Add ½ teaspoon freshly ground black pepper with the sugarRose: Add 2 teaspoons rose water with the juice Sumac: Add 2 teaspoons sumac with the juice Black pepper: Add ½ teaspoon freshly ground black pepper with the sugar Rosemary: Add 1 large rosemary sprig with the sugar (make sure to remove the sprig before canning)Vanilla: Add 1 vanilla bean, split, with seeds scraped with the sugar (remove the pod before canning) Ginger: Add 2 tablespoons freshly grated ginger with the sugar Black pepper: Add ½ teaspoon freshly ground black pepper with the sugar Lemon verbena: Add 4 whole lemon verbena sprigs with the sugar (remove sprigs and leaves before canning)Vanilla: Add 1 vanilla bean, split, with seeds scraped with the sugar (remove the pod before canning) Spices: Add ½ teaspoon ground cardamom or cinnamon with the sugar Turmeric: Add 2 teaspoons freshly grated turmeric (or ½ teaspoon dried) with the sugarGinger: Add 2 tablespoons freshly grated ginger with the sugar Black pepper: Add ¼ teaspoon freshly ground black pepper with the sugar Lime: Add 1 tablespoon freshly grated lime zest with the juiceGarlic: Add 4 smashed garlic cloves with the sugar Chile de arbol: Add 2 to 3 whole chiles de arbol or ½ teaspoon crushed red pepper flakes with the sugar Rosemary: Add 2 sprigs rosemary with the sugar (make sure to remove the sprigs before canning)Mustard: Add 2 teaspoons yellow mustard seeds with the sugar Harissa: Add 1 tablespoon harissa paste with the sugar Turmeric: Add 2 teaspoons freshly grated turmeric (or ½ teaspoon dried) with the sugarVanilla: Add 1 vanilla bean, split, with seeds scraped with the sugar (remove the pod before canning) Cinnamon: Add 2 cinnamon sticks with the sugar (make sure to remove the sticks before canning) Star anise: Add 3 star anise pods with the sugar (make sure to remove the pods before canning)Cardamom: Add 1 teaspoon ground cardamom with the sugar Ginger: Add 2 tablespoons freshly grated ginger with the sugar Brandy: Add 2 tablespoons brandy with the sugar Rosemary: Add 1 large rosemary sprig with the sugar (make sure to remove before canning)
- It should go without saying that the most important part of the jam-making process is cooking the fruit (since, well, it’s what makes it jam). This is when water evaporates, not only thickening the mixture, but concentrating flavors. Stay alert here: You want that perfect texture — not firm or bouncy, syrupy or pourable.To start, toss your fruit in sugar and let it sit at least 20 minutes before cooking it and up to overnight. This maceration pulls the juices from the fruit, which will dissolve the sugar, jump-starting the jam-making process and preventing clumps of sugar from caramelizing. The jam must then be cooked over high heat in order to evaporate the water as quickly as possible and harness the power of the natural pectin. (Cooking time can vary, depending on a fruit’s water content, but once it’s at a rolling boil, expect to cook it for at least 40 to 50 minutes. Raspberries and blackberries tend to have less water than a strawberry or apple, making them faster to cook.) The high temperature leaves the jam susceptible to burning or scorching at the base of the pot (especially so if you’re using a non-copper pot), so it’s extremely important to stir it constantly once it’s started to thicken even a little. The edges of the pot are most susceptible to this kind of burning, so pay extra close attention there. Skimming the jam: As the jam simmers, a whiteish, cloudy foam will most likely form. It’s made up of impurities rising to the top and should be skimmed, as when making chicken stock, to prevent a cloudy or muddy result. Use a fine-mesh strainer or a shallow, wide spoon, and rinse the strainer or spoon between uses to keep the foam from returning to the jam.Testing the jam: When you think the jam might be close to the perfect texture, you’ll want to test it for doneness. It’s better to find out if the jam is too runny early, rather than once it’s in the jars. To do this, spoon a bit of hot jam onto a chilled plate and drag your finger or spoon through it. How it moves on the plate (or doesn’t) will give you an idea of how thick and jammy (or runny and loose) the jam will be once cooled completely. Typically, it will start to form a gelled skin on top, indicating it’s going to set up. If the chilled jam still seems watery or syrupy, it needs more time to cook.
- You don’t necessarily have to can your jam — you can put it in a clean jar and throw it in the refrigerator, eating it within a couple of weeks. But if you want it to last longer, you’ll want to take the extra step. Canning seals the jars, protecting the contents from mold, bacteria or yeast growth, and allows them to be stored in a cool, dark place without refrigeration.Clear your countertops, gather the equipment you’ll need (pot, utensils and strainer, along with a few paper towels), and leave your schedule open. Making jam requires your full attention to prevent scalding, burning or scorching.In the event you don’t own a proper canning bath, all you’ll need is a large, wide pot. If you’ve got a wire rack that can fit inside, all the better to ensure the water boils under the jars as well as around them.You’ll want to prepare your jars as you cook your jam, or slightly before. It’s recommended that your jars are hot (or, at the very least, warm) to prevent any cracks that can occur from the hot jam hitting a cold jar. Wash jars with warm, soapy water (no need to wash the lids), making sure all soapy residue is completely rinsed away. If you plan on canning your jam, you must sterilize the jars. To do this, place the jars in a large pot and fill it with water until the jars are covered. Bring to a boil and cover. Continue to boil for 15 minutes. Remove the pot from the heat and add the lids. (Do not boil the lids: Their rubber seal is too delicate.) Using clean tongs, remove the jars from the water and place them to dry upside-down on a clean wire rack, or right-side-up on a clean kitchen towel laid over a baking sheet. (Some prefer to sterilize jars by running them through the dishwasher without detergent or by placing the jars on a rack in a hot oven, but those methods are not approved by the U.S.D.A.)Once the jam is ready, it’s time to ladle it into the jars. Have your paper towels ready to wipe any spills along the rim. It’s important that the jam be as hot as possible when you fill and seal the jars. The steaming jam makes a vacuum that sucks out the air in the jar, creating a preliminary seal. You will want to fill the jars as close to the top as possible without overfilling, as air in the jars increases the risk of spoilage. It may take a couple of tries — and some overflowing jars — before you hit that sweet spot, but a good rule of thumb is to aim for ¼ inch to ½ inch below the rim. Here, it’s better to go under than over. When putting on the lid, screw the band on just shy of tight. You’ll want to give the jar’s contents room to expand while the jars are being processed. Also, it’s unlikely, but if the jars are sealed too tightly, the glass could crack. Once the jars are filled and sealed, place them in a large pot of boiling water, making sure they’re submerged by at least 2 inches, and boil for 15 minutes. (Note that the boiling time can vary depending on the fruit and the size of the jars, but, for high-acid fruits in an 8-ounce to 16-ounce jar, 15 minutes will get the job done. You’ll want to adjust for high-altitude canning.) Using tongs, remove each jar, and, with a dish towel to protect your hands, screw the lid on as tightly as possible. Let jars come to room temperature, undisturbed, before storing in a cool, dark place. While it’s not mandatory to seal the jars this way, be aware that skipping this step drastically reduces the jam’s shelf life. If not canned, the jams will need to be stored in the refrigerator (or, if you like, store cooled jam in plastic bags and keep it in the freezer).While the band is there to provide added insurance, the real seal happens in the lid, which should be flexed concavely and unable to move or pop. If this is not the case, you must unscrew the band, remove the lid and start over (with new lids).
- Even the best-made jams can go awry. They might scorch or develop mold, be too sweet or lose their seal, leaving you wondering what you’ve done wrong. Here are a few frequently asked questions – and their answers – to help guide you on your path to perfect jam.I don’t have enough blackberries. Can I add another fruit to substitute? If you’re short on the amount of fruit required for a recipe, you can add another. Purists may argue differently, but perhaps they’ve never tasted a peach-blackberry jam. When mixing and matching, it’s important to keep the same total amount of fruit (for example, if that peach-blackberry jam recipe calls for 4 pounds, supplement 3 pounds of blackberries with a pound of cut peaches) and continue with the recipe for the larger amount of fruit (here, blackberries). My jam won’t set. If you’ve been cooking your jam for the amount of time required and it’s still not setting, cook it a few minutes longer to evaporate some more of the water in the fruit. It’s also important to manage expectations. Some fruit with lower amounts of natural pectin, like strawberries, will never quite reach the same gel-like consistency as those with an abundance of it, like blueberries. As long as it’s no longer syrupy, pieces of fruit swimming in a syrup, you should be all good. My jam scorched a little on the bottom. If a corner of the pot is beginning to scorch, the jam is potentially still salvageable. Transfer the pot’s contents to a large bowl and thoroughly clean the pot. Taste the fruit. If it has any burned or too-caramelized notes, it’s best to take the loss and start over. If it’s fine, place the fruit back in the pot and continue cooking, taking care to keep the pot directly over the burner and to stir constantly to prevent further scorching. My jam is too sweet. Throwing in an extra tablespoon of lemon or lime juice at the end can help, but avoid adding any more than that as it could make the jam runny. Keep in mind that jam will also be sweetest when it’s hot: The flavors (including its sweetness) will mellow once chilled. The seal on my jars has broken. If you notice the lid has popped without opening, it means the lid is no longer sealed and, as a result, is ineffective at keeping bacteria and mold at bay. Since most jams are stored where we cannot keep tabs on them, it’s hard to say how long a seal has been broken. Throw these jams away, just to be safe, though the jars themselves can still be reused, if sterilized. My jam has been canned for a few days but I’ve noticed it fizzing, forming bubbles or growing mold. Mold growth and accidental fermentation are two telltale signs of improper canning. If you notice fizzy bubbles or blue or white mold growing on the top of the jam or inside of the jar, throw away the jam. (The jars themselves can still be reused, if sterilized.)
JAM RECIPES | BBC GOOD FOOD
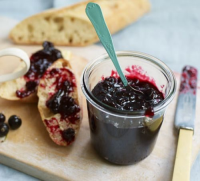
A pot of homemade preserve always beats shop-bought. Spread these fruity jams on hot buttered toast or give them away as gifts.
Provided by Good Food team
Number Of Ingredients 1
More about "jam making pan recipes"
BASIC JAM RECIPE | MARTHA STEWART
The skins from stone fruit will contribute color and flavor to the jam. But for a smoother mixture, you can start by peeling peaches or nectarines: Carve an X in the bottom of each and plunge them into boiling water for 30 seconds, then transfer them to an ice-water bath to stop the cooking; the skins will slip off. For plums, just lift the skins out of the cooked jam with a fork.
From marthastewart.com
Reviews 0
Total Time 45 minutes
Category Gluten-Free Recipes
From marthastewart.com
Reviews 0
Total Time 45 minutes
Category Gluten-Free Recipes
- Ladle jam into clean containers, leaving 3/4 inch of headroom. Let cool completely. Cover, label, and refrigerate up to 1 month, or freeze up to 1 year.
See details
HOW TO MAKE JAM - NYT COOKING
Preserve fruit at the height of its season, and enjoy it all year round. Alison Roman will show you how.
From cooking.nytimes.com
From cooking.nytimes.com
- Even the best-made jams can go awry. They might scorch or develop mold, be too sweet or lose their seal, leaving you wondering what you’ve done wrong. Here are a few frequently asked questions – and their answers – to help guide you on your path to perfect jam.I don’t have enough blackberries. Can I add another fruit to substitute? If you’re short on the amount of fruit required for a recipe, you can add another. Purists may argue differently, but perhaps they’ve never tasted a peach-blackberry jam. When mixing and matching, it’s important to keep the same total amount of fruit (for example, if that peach-blackberry jam recipe calls for 4 pounds, supplement 3 pounds of blackberries with a pound of cut peaches) and continue with the recipe for the larger amount of fruit (here, blackberries). My jam won’t set. If you’ve been cooking your jam for the amount of time required and it’s still not setting, cook it a few minutes longer to evaporate some more of the water in the fruit. It’s also important to manage expectations. Some fruit with lower amounts of natural pectin, like strawberries, will never quite reach the same gel-like consistency as those with an abundance of it, like blueberries. As long as it’s no longer syrupy, pieces of fruit swimming in a syrup, you should be all good. My jam scorched a little on the bottom. If a corner of the pot is beginning to scorch, the jam is potentially still salvageable. Transfer the pot’s contents to a large bowl and thoroughly clean the pot. Taste the fruit. If it has any burned or too-caramelized notes, it’s best to take the loss and start over. If it’s fine, place the fruit back in the pot and continue cooking, taking care to keep the pot directly over the burner and to stir constantly to prevent further scorching. My jam is too sweet. Throwing in an extra tablespoon of lemon or lime juice at the end can help, but avoid adding any more than that as it could make the jam runny. Keep in mind that jam will also be sweetest when it’s hot: The flavors (including its sweetness) will mellow once chilled. The seal on my jars has broken. If you notice the lid has popped without opening, it means the lid is no longer sealed and, as a result, is ineffective at keeping bacteria and mold at bay. Since most jams are stored where we cannot keep tabs on them, it’s hard to say how long a seal has been broken. Throw these jams away, just to be safe, though the jars themselves can still be reused, if sterilized. My jam has been canned for a few days but I’ve noticed it fizzing, forming bubbles or growing mold. Mold growth and accidental fermentation are two telltale signs of improper canning. If you notice fizzy bubbles or blue or white mold growing on the top of the jam or inside of the jar, throw away the jam. (The jars themselves can still be reused, if sterilized.)
See details
JAM CAKE RECIPE - FOOD.COM
This is another of those cakes passed down from Mom. When DH and I were married, he did not like cake. Mom has a reputation for making fabulous cakes and she converted him! Prep time includes 15 minute cooling time.
From food.com
Reviews 5.0
Total Time 1 hours 25 minutes
Calories 5865.2 per serving
From food.com
Reviews 5.0
Total Time 1 hours 25 minutes
Calories 5865.2 per serving
- Sift powdered sugar over it while still warm.
See details
HOW TO MAKE THE BEST HOMEMADE JAM IN 4 STEPS: EASY BERRY ...
Apr 26, 2019 · Making your own jam takes a little time, patience, and sticky fingers, but soon you’ll be rewarding yourself with jars of jam for days to come. Once you learn how to make jam, you can tweak it with a mixture of fruit and sugar to your liking. Small batch jam stored in the refrigerator is great for solo cooks who want to experiment with changing farmers’ market jewels.
From masterclass.com
From masterclass.com
See details
HOMEMADE JAM RECIPES FOR BEGINNERS | KITCHN
From thekitchn.com
See details
BEST POT FOR MAKING JAM - OUR TOP PICK | BEST POTS PANS
From bestpotspans.com
See details
BASIC JAM RECIPE - TRADITIONAL HOME BAKING
Jul 01, 2020 · Instructions. Wash the jars in hot soapy water and either put in a roasting tin and sterilise in the oven at 160C/fan 140C/gas 3 for 10 mins, or put upside down in the top of the dishwasher and run a hot wash without detergent. The jars need to be warm when filled so time this carefully. Put a saucer in the freezer.
From traditionalhomebaking.com
From traditionalhomebaking.com
See details
COPPER PANS FOR JAM MAKING - PRESERVED
The golden rule of jam-making is to transform your fruit into jam as quickly as possible. Why? We want to capture the fresh fruit flavor rather than have an over-extracted, cooked fruit flavor. Five features make the copper jam pan special: Depth-to-surface area ratio: Having a wide pan base and shallow sides allows for all of the fruit to be exposed to the cooking surface, enabling a faster ...
From preservedgoods.com
From preservedgoods.com
See details
TEN STEPS TO JAM-MAKING | HOW TO COOK | DELIA ONLINE
If things go wrong: if the jam hasn’t set after cooling and potting, tip it all back into the pan and boil again, adding the juice of a small lemon; if mould develops on the surface of jam in a jar, remove it with a spoon, along with about half an inch (1 cm) of the jam underneath – rest assured, the rest of the jam will not be affected ...
From deliaonline.com
From deliaonline.com
See details
HOW TO MAKE JAM | FEATURES | JAMIE OLIVER
Oct 12, 2015 · Jamie’s recipe for incredible homemade strawberry jam is super-simple and will give you a delicious, soft set, sweet and sticky jam. While your jars are sterilising (see above), wash your fruit and add to a large pan with the sugar.
From jamieoliver.com
From jamieoliver.com
See details
HOMEMADE JAM RECIPES FOR BEGINNERS | KITCHN
Jun 17, 2019 · 7. Triple Berry Quick Jam. This triple berry combo of raspberries, strawberries, and blackberries is the perfect choice if you’re indecisive and can’t pick which summer berry to use. Credit: Emily Han. 8. Onion-Thyme Jam. Thyme lends an earthy, lightly floral note to this savory jam.
From thekitchn.com
From thekitchn.com
See details
HOW TO MAKE JAM 2021 | THE STRATEGIST
Apr 03, 2020 · While Le Creuset may feel fancy already, the true sign of status in the jam-making world is a Mauviel copper jam pan. Crafted in France, Mauviel is a family-owned copper kitchenware company that ...
From nymag.com
From nymag.com
See details
HOW TO MAKE EASY SKILLET JAM - BON APPÉTIT | BON APPÉTIT
Jun 01, 2015 · Avoid the stove top cleanup and cook the jam in a sauce pot—or at least a very deep skillet. Add the berries to the pot set over medium heat, along with a pinch of salt and a sweetener of your ...
From bonappetit.com
From bonappetit.com
See details
JAM MAKING 101: THE TOOLS AND TECHNIQUES FOR SUCCESS
Aug 10, 2018 · Jam Making 101: The Tools and Techniques for Success. Jennifer Latham is the director of bread for Tartine Bakery. She is the co-author, with Chad Robertson, of Bread Book (2021) and co-narrator, also with Robertson, of the audiobook Getting Started with Sourdough. Plum jam with fresh beignets.
From seriouseats.com
From seriouseats.com
See details
CREATING INCREDIBLE SAUCES WITH JAM - LIVING HOMEGROWN
Making a Quick Sauce by Deglazing: ( Notice Step 5) After cooking your meat, remove it from the pan. If there is a lot of fat, remove all but a few tablespoons. Place the pan over medium-high heat. Add 1/2 cup cold liquid such as stock, broth, vinegar or an alcohol such as wine or brandy. Red or white wine is usually my liquid of choice.
From livinghomegrown.com
From livinghomegrown.com
See details
AMAZON.COM: KILNER STAINLESS STEEL PRESERVING JAM PAN ...
The wide neck of the pan allows for more evaporation meaning setting point is achieved quicker. the shape and base along with the carry handle, support handle, integral pouring lip and measuring gauge makes this pan a must have item for any preserver. Set Contains: 8 Litre Stainless Steel Preserving Jam Pan care and use label
From amazon.com
From amazon.com
See details
PAN DE JAMÓN RECIPE (VENEZUELAN HAM AND OLIVE BREAD)
Aug 22, 2021 · On a lightly floured surface, roll half of the dough into a large rectangle about 10 x 12 inches. Brush the dough with 1 tablespoon of the melted butter. Place half of the ham slices over the dough, leaving a 1-inch border all around. Sprinkle half of the raisins and half of the olives around over the ham.
From thespruceeats.com
From thespruceeats.com
See details
HOW TO MAKE JAM: 15 STEPS (WITH PICTURES) - WIKIHOW
Aug 04, 2021 · 1. Ladle the jam or jelly into the prepared jars. Use a canning funnel to guide the jam into the jar. Make sure to leave 1/8 inch of empty space, or "head space", at the top of each jar. Wipe the rims and threads of the jars with a clean, damp cloth to remove any residue or drips.
From wikihow.com
From wikihow.com
See details
BLACKBERRY JAM CAKE - PLOWING THROUGH LIFE
Sep 14, 2020 · Easy Blackberry Jam Cake Recipe. Preheat oven to 350°F and grease a bundt pan, tube pan or round cake pans. Using a bundt pan is the easiest and prettiest option for me. Using an electric mixer blend softened butter, eggs and sugar together. In a seperate bowl mix or sift flour, baking soda, cinnamon, allspice and nutmeg together.
From plowingthroughlife.com
From plowingthroughlife.com
See details
HOW TO MAKE PINEAPPLE JAM WITH 2 INGREDIENTS [NATURAL]
May 25, 2018 · Tips. Jam making is easy but you need to make sure that you follow some simple rules when preparing jam. You need to be hygienic and clean - wash your hands a million times, use only clean utensils, sterilize your jars and lids and implement my vacuum trick mentioned further below in the recipe card.. Use tools to assist you to take out the hot sterilized jars or to fill your jars with jam ...
From masalaherb.com
From masalaherb.com
See details


