HOW TO USE A KITCHENAID STAND MIXER RECIPES


BASIC BAKING POWDER BISCUITS (MODIFIED FOR STAND MIXERS ...
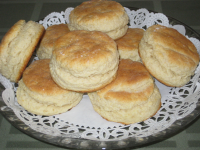
These biscuits are light inside, slightly crispy on the outside. They are terrific for breakfast served as biscuits topped with a hearty sausage gravy (such as Sawmill Gravy recipe #: 56251) or as an accompaniment to any stew or "meat and potatoes" type dinner. (Note: Mixer speed settings are for KitchenAid stand mixers; adjust accordingly for the brand of mixer that you will be using)
Total Time 25 minutes
Prep Time 10 minutes
Cook Time 15 minutes
Yield 8 biscuits
Number Of Ingredients 7
Steps:
- Preheat oven to 425° F.
- Place flour, baking powder, sugar and salt into mixer bowl with flat beater. On Speed 1, stir dry ingredients for a little under a minute to evenly distribute.
- Cut cold butter into cubes and add to mixer bowl with the dry ingredients. Turn to Stir Speed and mix about 1 minute, or until mixture resembles small crumbs a little smaller than peas. Stop and scrape bowl.
- Add milk. Turn to Stir Speed and mix until dough starts to cling to beater. Usually less than 30 seconds. Avoid overbeating.
- Turn dough onto lightly floured surface and gently pat the dough to 1/2-inch to 1 inch thickness. Cut with floured 2-inch biscuit cutter or floured glass.
- Place on greased baking sheet and (optional) brush with melted butter, if desired.
- Bake at 425° F for 12 to 15 minutes, until golden. Serve immediately.
Nutrition Facts : Calories 206.3, FatContent 8.4, SaturatedFatContent 5.2, CholesterolContent 22.1, SodiumContent 337.9, CarbohydrateContent 28.6, FiberContent 0.8, SugarContent 4.4, ProteinContent 4.1
BAGELS 101 (USING A STAND MIXER) RECIPE - FOOD.COM
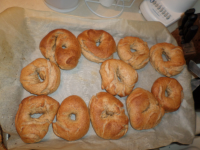
This is a great recipe for a 'bagel party' where everyone can choose and prep their bagel filling and topping choices. This recipe can easily be halved or doubled. We tweaked this very detailed recipe from the book 'The Best Bagels are Made at Home' by Dona Z. Meilach. We took the stand-mixer version and simplified the instructions as well as made some other adjustments as we went along to perfect it and keep it simple. Choices for different types of flavors are listed at the beginning. Selections for different types of toppings are listed at the bottom of the recipe. NOTE: It's recommended to print, read, and understand the instructions completely before beginning. Onion Bagels: Add 2 tablespoons of dehydrated minced onion, and replace salt with onion salt. Italian Herb Bagels: Add 2 teaspoons of Italian seasoning, and replace salt with onion salt.
Total Time 1 hours
Prep Time 30 minutes
Cook Time 30 minutes
Yield 8 serving(s)
Number Of Ingredients 5
Steps:
- CHOOSE YOUR FLAVOR (if other than plain). This is for the dough portion ONLY: WHOLE WHEAT BAGELS: Follow basic recipe, omitting sugar. Use 3 Tbsp honey instead. In place of flour, use 2 cups whole wheat flour, 1/2 cup wheat germ, and about 2 3/4 cup all purpose flour, blended together. Knead with white flour. PUMPERNICKEL BAGELS: Follow basic recipe, omitting sugar. Use 3 Tbsp dark molasses in place of sugar. In place of flour use 2 cups rye, 2 cups whole wheat, 1 3/4 cups all purpose flour blended together. Knead with white flour. ONION BAGELS: Add 1/2 cup dried onion or 1 pkg Lipton onion soup mix to the wet mixture before adding flour. (See 'THE BAKE' if you only want some of the bagels to be onion flavor).
- THE DOUGH: Using your KitchenAid with the dough hook attachement, combine the water (125F.), sugar, salt, and yeast. Add 3 cups of the flour and then the remaining flour 1/2 cup at a time until a ball forms. Knead (by hand or with the dough hook) for about 3 minutes, adding more flour a little at a time if necessary. When dough appears near desired consistency, knead in any additions for 1 minute or until incorporated. (NOTE: You can also knead till almost ready, remove the dough from your KitchenAid, and divide dough into individual (or a few each) bagels and add different ingredients to each bagel so you get a varied batch of bagels from one recipe). SUGGESTIONS: dried fruits (such as raisins, apples, cranberries), nuts, seeds, spices (such as dried minced onion or garlic), chocolate morsels or shavings, or any combination of flavorings. Knead in the ingredients until just combined, about 1 minute. Place into a lightly oiled bowl, cover with a towel and let rise (1st RISE) for 20 minutes.
- THE SHAPE: Punch down dough and place on a floured work surface. Use a food scale if you want consistency, and separate dough into balls; for 8 large, 12 regular, or 16 (mini bagels). Choose a shaping method and begin: 1) THE FINGER IN THE MIDDLE METHOD: Roll each piece of dough into a ball, poke a floured finger through the center to form the hole, and then shape top and smooth sides. With the bagel on the floured counter, place your finger in the hole with the tip of your index finger touching the counter, and make small fast circles with your finger to hula-hoop the bagel around it, to widen the hole. 2) THE ROPE METHOD: Roll each piece of dough into a rope by rolling it on the bread board or between your hands. Wrap the rope around four fingers, overlap and join the ends, and turn the circle inside out. Until you get this hand movement down pat, you may have to moisten the ends to hold them together. Initially the length may be lumpy and the joint will show. It takes practice. NOTE: Keep in mind that bagels do not rise very much, so you want them to be puffy when you shape them. Don't flatten them down.
- THE 2nd RISE: During the 2nd rising, the bagels will puff up slightly. Place on a baking sheet lined with parchment paper. Cover them with a plastic wrap that has been sprayed on one side with nonstick vegetable spray. Place them in a draft free location and let them rise at room temperature until puffy, about 20 minutes. NOTE: Bagels can be refrigerated at this point, should you decide to boil and bake them later, or the next morning. Leave them covered so they do not dry out. Remove from the refrigerator and allow to warm slightly while you boil water and preheat the oven.
- THE BOIL: Fill a 5 quart soup pot with water 4 inches deep (you can add 2 tablespoons honey or sugar for a sweeter bagel). Drop bagels one at a time into the boiling water. Boil about 3-4 at a time or only so many that they float freely, and are not crowded. Simmer for 30 seconds (15 seconds on each side), turning with a slotted spatula. NOTE: Put the top side of the bagel down into water first, and then turn over. When you remove them, the bagels will be top side up and slide off your spatula for draining and adding toppings. Remove and place them gently on a lightly greased cooling rack (that has been placed on top of a clean dish towel) for a few minutes to drain.
- THE GLAZE: Choose your glaze and brush tops before placing them in the oven: 1) WATER GLAZE: Spray bagels at the beginning of the baking (using a mist bottle makes this easy), again 5 minutes after placing them in the oven and again near the end of baking. A spray (or brushing) with room-temperature tap water will yield a subtle glaze. 2) NONSTICK COOKING SPRAY GLAZE: Spray before placing in the oven and again about 5 minutes before baking time is completed. Nonstick cooking spray goes on more evenly than using a brush and yields an even glaze. 3) EGG GLAZE: Mix together 1 egg with 1 tbs. water, milk, or cream. Brush it on the bagels before they are put into the oven. 4) CORNSTARCH GLAZE: Dissolve 2 tbs. cornstarch in 1/4 cup cold water. Bring 1 cup water to a boil and whisk the dissolved solution into the boiling water until it thickens. Brush it on the bagel tops at the beginning of the baking and again as soon as you remove the bagels from the oven for a very high shine.
- THE TOPPINGS: A variety of toppings can be added to the bagel before baking, either directly to the dough after settling, or after the bagel is glazed. Use as much or as little topping as you like. To brush the toppings on, use a ratio of 2-1 dry ingredients/1 water or oil. VARIATIONS: ONION- Use dehydrated onion flakes or packaged onion soup mix. 3) SEEDED- Sprinkle boiled bagels with sesame seed, poppy seed, or caraway seed (especially good on rye bagels) after using glaze and prior to baking. Poppy, caraway, sesame and celery seeds can be used directly from the jar. Just dip the bagels into a dish of seeds or sprinkle seeds on top. 4) TOASTED NUTS: Using them on (and in) bagels enhances their flavor. Walnuts, almonds, pecans or hazelnuts can be used on bagels as toppings and also added to the dough at the beginning or before they are shaped and rise the second time. 5) OATS/GRAINS: Sprinkle with rolled oats or multigrain cereal, which will brown while baking.
- THE BAKE: Preheat the oven to 400°F Choose your baking surface then continue on to the steaming. 1) BAKING SHEET: Line a baking sheet with parchment paper (as it eliminates the use of oil and cornmeal and cleaning pans). Place bagels on the shelf just below the middle in the oven. 2) BAKING STONE: Place the stone on the lowest rack in your oven while preheating the oven (with stone inside). Sprinkle cornmeal on the stone. Transfer un-baked bagels to the hot surface using a wooden peel (a long-handled wooden paddle used in baking), or any flat instrument with a long handle so you don't burn yourself; wear heavy padded gloves (NOTE: you can also place parchment paper on your peel and slide it off onto the stone with the bagels right onto the peel). NOW FOR STEAMING (Optional): Place a heavy pan in the very bottom of your oven (under the bottom rack) while it is preheating. Place the bagels in the oven and then pour cold water or half a dozen ice cubes into the pan and spray the sides of the (preheated) oven with water from a spray mist bottle when you place the bagels inside (This gives the bagel tops a crisp crust and extra shine by creating steam during the first few seconds of the baking). Bake for 20-40 minutes (depending on their size) until the tops are a light golden brown.
- STORING BAGELS: Bagels are best when they're eaten fresh from the oven while still warm. Once cooled, keep them in a brown paper bag for up to 12 hours. Any longer, and freezing is recommended. Slice them horizontally before freezing. Place the halves in a ziploc freezer bag and place in freezer. Thaw bagels on the kitchen counter in a plastic bag for about 15 minutes or toast directly from the freezer. What if a few bagels get stale? Put them into your blender or food processor and grind them into bread crumbs. None of the tasty bread need ever go to waste!
Nutrition Facts : Calories 336.9, FatContent 1, SaturatedFatContent 0.1, CholesterolContent 0, SodiumContent 876.5, CarbohydrateContent 71, FiberContent 2.8, SugarContent 5, ProteinContent 9.6
More about "how to use a kitchenaid stand mixer recipes"
BASIC SPONGE CAKE | RECIPES | KITCHENAID UK
This traditional English sponge cake is a tasty tea-time treat.
From kitchenaid.co.uk
From kitchenaid.co.uk
See details
16 KITCHENAID MIXER RECIPES YOU MAY NEVER HAVE THOUGHT TO MAKE
From tasteofhome.com
See details
HOW TO USE KITCHENAID MIXERS : SWEET RECIPES - YOUTUBE
From m.youtube.com
See details
104 THINGS YOU CAN MAKE WITH YOUR KITCHENAID STAND MIXER ...
From blog.williams-sonoma.com
See details
9 STEPS TO USE A STAND MIXER | KITCHENAID
From bing.com
See details
20 BEST KITCHENAID MIXER RECIPES - INSANELY GOOD
From insanelygoodrecipes.com
See details
30+ CREATIVE WAYS TO USE A KITCHENAID MIXER - DON'T WASTE ...
From dontwastethecrumbs.com
See details
KITCHENAID STAND MIXER BREAD RECIPES
Steps: Combine 4 cups flour, yeat, salt,dough enhancer. Combine water, oil, honey. Add to dry. Mix until well distributed. Rest for 15-20min til double. Add the rest of flour. Mix using mixer until it cleans the sides of bowl. Add flour if needed. Knead until soft and smooth. About 10-15min. On ...
From tfrecipes.com
From tfrecipes.com
See details
MAKING BREAD IN A KITCHENAID STAND MIXER - PRODUCT HELP ...
When kneading yeast doughs, always use Speed 2 only for optimum results. Kneading in a mixer for 2 minutes is very efficient and is equivalent to kneading 10-12 minutes by hand. It will be necessary to adjust the kneading times in your favorite recipes, to avoid over kneading. The dough should form a ball and clean the sides of the bowl.
From producthelp.kitchenaid.com
From producthelp.kitchenaid.com
See details
104 THINGS YOU CAN MAKE WITH YOUR KITCHENAID STAND MIXER ...
Mar 04, 2019 · The KitchenAid stand mixer has become such a popular wedding present that some joke the city hall clerk hands you one along with your marriage license. And for good reason: The mixer helps home cooks and bakers make an incredible range of foods. From pavlova to fresh pasta to orange juice to carrot cake, the sky is truly the limit with the KitchenAid mixer.
From blog.williams-sonoma.com
From blog.williams-sonoma.com
See details
61 KITCHENAID RECIPES THAT STAND, MIX, AND DELIVER | BON ...
Nov 25, 2019 · 61 KitchenAid Recipes That Stand, Mix, and Deliver. Monkey bread, pretzels, easy cakes, and more ways to let the stand mixer do the work. Your arms deserve a break. By Bon Appétit.
From bonappetit.com
From bonappetit.com
See details
HOW TO MAKE AMAZING MASHED POTATOES WITH A KITCHEN AID MIXER
Oct 12, 2021 · I love my KitchenAid stand mixer. I use it time after time, day after day. If you have a Kitchen Aid or have been wanting one, today I’ve got the perfect recipe that you’ll want to try! The KitchenAid mixer makes making mashed potatoes SO easy.
From simplysidedishes.com
From simplysidedishes.com
See details
HOW TO MAKE REAL BUTTER USING A KITCHENAID STAND MIXER
In your KitchenAid Stand Mixer, pour whipping cream into mixing bowl. Using the Wire Whisk/Whip Attachment, and Splash Guard (if you have one), begin mixing the Cream. Start on Speed 1 and work your way up to 10. You may need to hold a kitchen towel over the openings to prevent excess splashing. In approximately 3 minutes you will notice the ...
From alittleinsanity.com
From alittleinsanity.com
See details
KITCHENAID PIZZA DOUGH RECIPE – A COUPLE COOKS
Jan 19, 2018 · In the bowl of a stand mixer, combine all ingredients (except cornmeal). Leave out a small amount of the water. Using the dough hook from the mixer, stir until a loose dough forms. If a dough doesn’t form, add the rest of the water. If the dough is extremely wet and sticky, and a pinch of flour.
From acouplecooks.com
From acouplecooks.com
See details
8.Do not use the stand mixer outdoors. 9.Do not let the cord hang over edge of table or counter. 10.Remove flat beater, wire whip or dough hook from stand mixer before
From kitchenaid.com
From kitchenaid.com
See details
HOW TO MAKE FLOUR TORTILLAS WITH A KITCHENAID | LEAFTV
Affix the bread hook attachment to the Kitchenaid stand mixer. Place 3 cups of flour into the Kitchenaid stand mixer. Add the salt and baking powder. Mix well on low speed. Add the shortening or lard to the flour mixture, and mix on low speed until little beads form in the mixing bowl. Lard is the more authentic choice for flour tortillas.
From leaf.tv
From leaf.tv
See details
750 KITCHENAID MIXER CAKE RECIPES IDEAS | CAKE RECIPES ...
Nov 18, 2017 - Explore Pat's board "KitchenAid Mixer Cake Recipes", followed by 3,382 people on Pinterest. See more ideas about cake recipes, cupcake cakes, desserts.
From pinterest.com
From pinterest.com
See details
KITCHENAID BREAD BOWL RECIPES - ALL INFORMATION ABOUT ...
Nov 15, 2021 · 7 Tips for Making Bread with a Stand Mixer | KitchenAid great www.kitchenaid.com. It is compatible with bowls ranging from 3 to 5 quart with a maximum recipe size of 4½ lbs of bread dough. The bowl-lift mixer bowl is secured to the base by two arms that lift the bowl smoothly into place under the beater for extra stability to handle large or heavy batches.
From therecipes.info
From therecipes.info
See details
HOW TO KNEAD DOUGH WITH A KITCHENAID STAND MIXER
May 14, 2020 · Designed for use at speed 1 and 2 on the KitchenAid stand mixer, the dough hook will become your trusty sidekick when you are whipping up heavy mixtures such as pizza dough, pasta or bread. Follow these simple steps to get started: Attach your flat beater, add your ingredients to the stand mixer bowl and mix to combine the ingredients whilst kneading on speed 1.
From kitchenaid.com.au
From kitchenaid.com.au
See details
HOW TO MAKE SAUSAGE WITH A KITCHENAID STAND MIXER
Mar 11, 2020 · Set up the grinding attachment on your KitchenAid stand mixer. Freeze your meat for 30 minutes before grinding to make it easier to grind. Prep your spice mixture separately. Remove the meat from the freezer and cut it into 1-inch cubes. Grind in the KitchenAid mixer on speed 4 using the food pusher.
From insider.com
From insider.com
See details


